No matter what kind of website you want to build – whether it’s a blog, a site promoting your local business or a small eCommerce store, choosing WordPress is a no-brainer. The wealth of themes and plugins that it comes with makes customizing your site super easy, and thanks to its advanced content management capabilities, you don’t need to write a single line of code to create a beautiful site your visitors will love.
And if you want to get the most out of your site and provide your visitors with top user experience, it’s recommended that you build your site on a Linux VPS. Why not a shared hosting? A virtual private server comes with a much better price to resources ratio and, after a quick learning experience, offers a lot more control and stability. Naturally, in this tutorial I’m assuming that you already know that – in the end, you’re looking for a way to set up WordPress on a Linux VPS with CentOS 😊 Without further ado – let’s jump right into it!
1. Establish an SSH connection and update the system
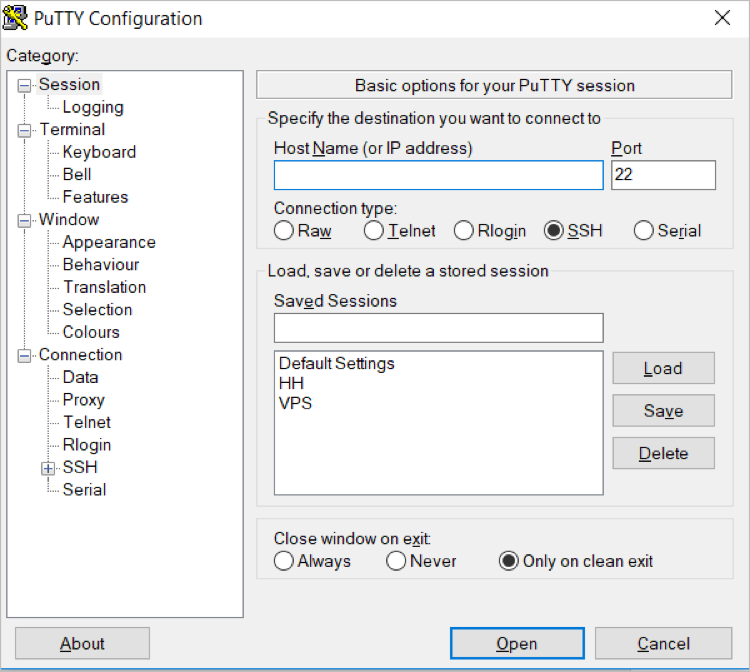
To get started, you will need to connect to your server using SSH. You can do that using a free client such as Putty. To connect, provide your host IP address and ensure that SSH is checked (sometimes, you might also have to change the port – depending on the server configuration):

Once you are connected, you will be asked for your username and password. After you establish a successful connection, it’s time to update system files. To do that, execute the following simple command:
yum update
note: if you’re not logged in with root, you’ll need to add sudo before every command
Unless your server is fully up to date, you will be asked to wait for a few minutes for the first update.
2. Install the required PHP modules
Next, you need to get the necessary modules that are required by WordPress to work correctly. Luckily, this can be done with just three commands. First, get the modules:
yum install php-gd
yum install php-xml
Once the installation finishes, restart Apache so that the modules you’ve just installed start working:
yum service httpd restart
3. Prepare the database
Another thing that WordPress needs to work correctly is a MySQL database. It is used to manage the information of both the site and its users. To create one, you need to log into MySQL as root:
mysql -u root -p
You will be asked to provide the login credentials that you used when you installed MySQL. If you have lost your login credentials or are not sure what to do here, contact your hosting support.
Next, it’s time to execute the command responsible for creating the database. In this example, I will call my database wordpressdb – but feel free to use whatever you want. Also, please notice that every MySQL commands needs a semicolon at the end:
CREATE DATABASE wordpressdb;
Once that’s done and the database is ready, you will need to create a user which your WordPress installation will use to access the database. I called mine wpdbuser and assigned him with a password – make sure that the password that you pick is secure and consists of different characters (whatever you choose – don’t copy the below one):
CREATE USER wpdbuser@localhost IDENTIFIED BY ‘password’;
Now that your user and database are ready, there’s just one step left before we can jump right into installing WordPress – we need to grant the user access to enter and edit the database. To give him full control, we will provide him with full privileges:
GRANT ALL PRIVILEGES ON wordpressdb.* TO wpdbuser@localhost IDENTIFIED BY ‘password’;
One more step – to let MySQL know that you made changes to database access settings, you need to first flush privileges:
FLUSH PRIVILEGES;
exit MySQL:
exit
and restart it to ensure that all changes are in place:
systemctl restart mysqld.service
Congratulations – we can now go straight to installing WordPress itself.
4. Install WordPress

Because WordPress comes as a zipped archive, you need to be able to unzip it first. To do that, let’s install wget and unzip:
yum install wget unzip
Next, download the latest WordPress archive itself:
wget http://wordpress.org/latest.zip
and unzip it to the right folder – so that it’s accessible for online users:
unzip -q latest.zip -d /var/www/html/
Of course, we need to grant those who want to see the site with the access to do so. At the same time, you want to protect the files from getting edited by unauthorized users.
Moreover, we want to be able to upload new files to our web server and enable the server itself to create and modify new WordPress files. To do all that, we need to set the right permission and ownership of the WordPress folder:
chown -R apache:apache /var/www/html/wordpress
chmod -R 755 /var/www/html/wordpress
Speaking of uploading, it’s time to create the upload directory:
mkdir -p /var/www/html/wordpress/wp-content/uploads
as well as assign the right server permissions to it:
chown -R :apache /var/www/html/wordpress/wp-content/uploads
And that’s it – our WordPress installation is almost ready. The last step? We need to configure WordPress itself before we can execute the installation script!
5. Connect WordPress to the database
Remember the database that we set a few steps ago? It’s time to point your WordPress installation to it. To do that, let’s go straight to the WordPress main directory:
cd /var/www/html/wordpress/
There, we need to find and edit the config file. Right now, it’s named wp-config-sample (we’ll change that soon). Let’s open it in a text editor:
vim wp-config-sample.php
As you can see in the file, we need to change the MySQL settings – database name, username, and password. I went ahead and put the names and password that we created before where you should include yours. First, the database name:
define(‘DB_NAME’, wordpressdb’);
Then, let’s edit the user:
define(‘DB_USER’, ‘wpdbuser’);
And provide the password:
define(‘DB_PASSWORD’, ‘password’);
And that’s it – if you provided all the details correctly, your WordPress installation is now connected to the database. The last step left is renaming the file so that WordPress can find it and use it. Exit the editor, save settings, and execute the following command:
mv wp-config-sample.php wp-config.php
Congratulations! Took a short while, didn’t it? Luckily, hosting WordPress on a VPS is worth it in the long run – especially that you install it just once and can reap the benefits of great speed and security for years to come. But what if you don’t want to play with all the code and still want a fast and reliable server?
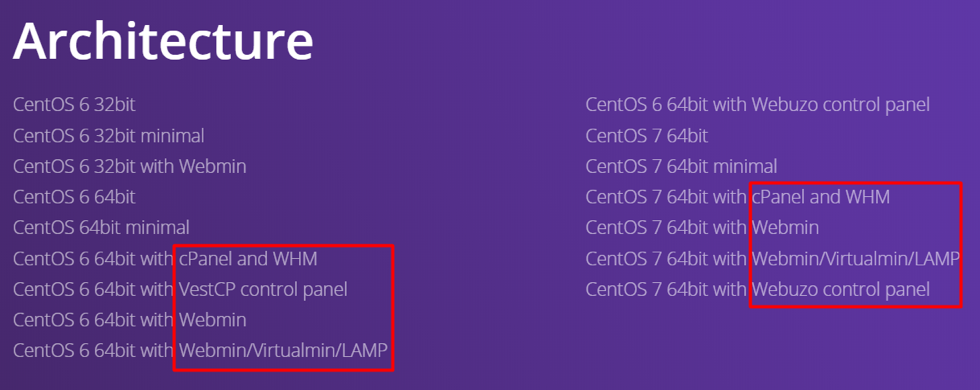
If you prefer to be able to deploy WordPress in seconds – with absolutely no manual work required, you should get a VPS package such as the one here: www.hostinger.com/vps-hosting/ which comes with multiple control panels you can choose from, some of which, such as cPanel, allow you to install WordPress in just a few clicks out of the box.
Regardless of whether you install everything manually or use a control panel to install WordPress, once all the files are there, you need to finish the installation by executing the installation file. You can do that by going to the following address (of course, use your own domain name)

www.yourdomain.com/wp-admin/install.php
Once that’s done, you will be asked to choose a language of your site and create an admin user. And that’s it – your site is ready for use!

